Our Blog

A home you have lived in for a while naturally gathers signs of everyday life, dust in corners, grime on surfaces, grease in the kitchen, and scale in the bathroom. Regular cleaning tools or DIY methods often cannot get rid of these completely. That is where a professional end of lease clean makes a real difference. Real estate agents prefer it because it saves time and ensures the property is ready for the next tenant. With proper tools, specialised products, and a clear checklist that meets landlord expectations, professionals can bring the space back to a standard that passes inspection without hassle.

Is End Of Lease a Legal Requirement?

While end-of-lease clean may not always be legally mandated, most rental agreements include a clause requiring tenants to return the property in the same clean condition as when they moved in. Failing to meet this condition can result in deductions from the security deposit or disputes with the landlord. In some regions, property managers follow strict cleanliness checklists during final inspections, and a professionally cleaned property is often the only way to meet those standards. So, while not technically a law, end-of-lease cleaning becomes a contractual obligation, and skipping it can cost you both money and peace of mind.

What Difference Do the Tools and Machines Bring?


The difference between a regular clean and a professional end of lease clean lies in the tools and technology used. Professional cleaners don’t rely on household brooms or basic sprays but the hype is around industry-grade machines and scientifically backed methods that guarantee a deep, hygienic, and inspection-ready finish.

Steam Cleaners are essential for sanitising bathrooms, kitchens, tiles, and even carpets. End of lease clean uses high-pressure vapour to loosen grime, kill bacteria, and remove grease without harsh chemicals, ideal for allergy-sensitive environments.

UV Inspection Lights help spot hidden stains, pet urine, and microbial growth that the naked eye can’t see. These are especially useful in carpets and corners, often overlooked during general cleaning.

HEPA Filter Vacuums trap 99.97% of dust particles, allergens, and microscopic debris, making them critical in achieving the dust-free conditions required during final inspections, especially in rental properties with pets or smokers.

Other commonly used tools include:

  • Rotary floor scrubbers for hard surfaces
  • Wet/dry extractors for carpet shampooing
  • High-reach dusters for vents and ceiling fans
  • Window vacuums for streak-free glass finishes
  • Chemical foggers or ozone machines for odour neutralisation

Why People Adore DIY Cleaning?

Of course, everyone’s first thought is saving money. Why pay someone else when you can just clean the place yourself with some basic supplies and effort? It seems like a smart and simple decision. Most people feel they know their space best and believe a few hours of  end of lease clean will be enough to get the job done.

There’s also that sense of control. When you do it yourself, you decide how it’s done, what products to use, and where to focus. It feels personal and straightforward, especially when there are so many cleaning tips and tricks available online. For many, it’s more about the peace of mind that comes with taking care of things on your own, without needing to rely on anyone else.

But while that makes sense in theory, end of lease clean is a different story. It goes beyond wiping down surfaces or vacuuming floors. It involves deep cleaning every corner, from inside appliances to behind furniture, and meeting a standard that landlords and property managers expect. So while the DIY route is easy to appreciate, it often doesn’t match the results that a professional service can deliver.

DIY Cleaning Is a Waste of Time and Risky

First and foremost, when you are leaving your rental home, you’re already dealing with the pressure of packing, relocating, paperwork, and coordinating move-out logistics. Adding the responsibility of deep cleaning the entire property, often within a tight deadline, is not only overwhelming but also counterproductive. Without professional experience, tools, or time, a DIY  end of lease clean approach becomes more of a gamble than a solution.

Here’s the reality. Landlords and property managers do not just look for surface-level tidiness. They inspect everything from grout lines and range hoods to skirting boards and window tracks. DIY  end of lease clean typically lacks the power and precision to meet these expectations. Without access to high-performance equipment like steam cleaners, HEPA vacuums, and specialized chemicals, it’s nearly impossible to achieve the same results.

Moreover, using the wrong products on surfaces like stone countertops or hardwood floors can lead to damage, and that may end up costing you part of your deposit. A rushed or incomplete clean can also delay final inspections, potentially putting your move-out date or next tenancy at risk

Why is end of tenancy cleaning important?

You can call the end of lease clean a blessing when you are moving into a new apartment. Everything feels fresh, neat, and ready to be called home. But the same moment can feel stressful when you are the one moving out and your landlord asks for a cleaning receipt. That is when you remember how nice it felt to step into a clean space and realise the same should be offered to the next tenant. A home should be returned in the same condition it was given to you.

For landlords and agents, end of lease cleaning Sydney goes far beyond basic cleanliness. It is about maintaining property value, creating a good impression for future tenants, and avoiding unnecessary delays in re-renting. A professionally cleaned home makes the handover smooth and shows that you have taken responsibility seriously. It protects your bond and leaves behind a positive experience for everyone involved in the leasing process.

Eco-Friendly and Compliance-Based Cleaning is Now A Requirement


These days in Australia, end of lease cleaning Sydney is not just about making a place look good. It is also about doing things the right way by following the rules and being mindful of the environment. In states like New South Wales and Victoria, rental laws say that tenants must leave the property in the same clean condition it was in when they moved in. This often includes carpet cleaning and pest control, especially if pets were living in the home.

At the same time, there is more focus on using eco-friendly end of lease clean methods. Landlords and agents now prefer services that use safe, non-toxic products and machines that do not harm the environment. This helps keep kitchens, bathrooms and other areas free from harsh chemical residue and makes the home safer for the next person moving in. Whether you are renting or offering cleaning services, people now expect you to meet both legal and environmental standards. Cleaning in a safe and eco-conscious way is not just a nice option anymore. It is what people look for and trust.

The Link Between Property Value and End-of-Lease Clean

End of Lease Cleaning Sydney does more than just help tenants get their bond back. It also plays a big role in how the property is seen by landlords, agents, and potential new tenants. A well-cleaned property leaves a strong first impression, which often leads to quicker rentals and higher interest from quality tenants. It shows that the place has been looked after, which helps maintain or even increase its market value over time.

On the other hand, if a property is handed back in poor condition, it can signal neglect and may cost the owner more in repairs, deep cleaning, or lost rental income. Professional end of lease cleaning ensures the space is fresh, presentable, and ready for the next inspection or viewing. For landlords, this protects their investment. For tenants, it builds trust and helps them exit on good terms. In short, an end of lease clean benefits everyone and adds long-term value to the property.

What Is Included in the End of Lease Cleaning

End of lease clean is a detailed and thorough process that covers every area of the property to make sure it is returned in the same clean condition it was in at the start of the tenancy. It is far more than a regular weekly clean. Here’s what is usually included:

  • General Cleaning: Dusting of all surfaces, walls, skirting boards, light fittings, switches, doors, and inside cupboards and drawers. Removal of cobwebs and marks on walls, where possible.
  • Kitchen: Deep cleaning of countertops, cupboards, sinks, stovetops, rangehoods, splashbacks, ovens, and inside and outside of all appliances.
  • Bathrooms: Scrubbing and descaling of toilets, showers, bathtubs, taps, tiles, mirrors, and vanities.
  • Floors and Carpets: Vacuuming and mopping of all floors. Professional steam cleaning of carpets if required by the lease agreement.
  • Windows: Cleaning of internal windows, tracks, and sills. External windows may be included depending on access.
  • Additional Areas: Cleaning of balconies, garages, laundry areas, and removal of rubbish if needed.

Some properties may also require pest control, blind cleaning, or outdoor area cleaning. Each checklist depends on the condition of the home and the expectations of the landlord or property manager. Professional cleaners follow these lists closely to make sure nothing is missed.

Candid Cleaners End of Lease Cleaning Service

When it is time to move out, leave the End of lease cleaning Sydney to us. At Candid Cleaners, our End of Lease Cleaning service is designed to meet the highest inspection standards set by landlords and real estate agents in Sydney. We do not just tidy up, we deep clean every corner, appliance, surface, and space to help you get your full bond back and leave the property in top condition.

Using high grade equipment and environmentally friendly products, our trained team follows a detailed checklist aligned with current industry expectations in 2025. From stubborn oven grease to bathroom mould and hard to reach dust, nothing is overlooked. We also offer optional add ons like carpet steam cleaning, wall spot removal, and balcony polishing.

Why is Mould a Major Issue in Sydney?

Sydney’s weather patterns, characterized by high humidity levels, frequent rains, and coastal influences, create the perfect conditions for mould growth. Many homes, especially older properties and poorly ventilated apartments, struggle with moisture retention. Poor air circulation and prolonged dampness make mould a persistent issue, particularly in areas like bathrooms, kitchens, and basements. Without proper intervention, mould can spread rapidly, leading to structural damage and health risks such as respiratory issues and allergies. The combination of Sydney’s climate and inadequate moisture control makes it essential for homeowners to proactively manage indoor humidity levels and address water leaks promptly. Recognizing these factors is the first step toward preventing mould infestations and maintaining a healthy living environment.

Top 10 Causes of Mould Growth in Sydney Homes

1. High Humidity Levels

Sydney’s coastal climate leads to naturally high humidity, often exceeding 60%, which promotes mould growth. Rooms with poor air circulation, such as bathrooms and bedrooms, are particularly at risk. Mould spores thrive in moisture-rich environments, growing on walls, ceilings, and even furniture. High humidity can also make it difficult to dry clothes indoors, adding to the moisture problem.
Solution: Use dehumidifiers and keep windows open for better airflow. Additionally, placing moisture absorbers in wardrobes and cabinets can help control indoor humidity.

2. Poor Ventilation

When indoor air cannot circulate properly, moisture builds up, creating an ideal breeding ground for mould. Newer homes designed for energy efficiency often have this problem due to tightly sealed windows and doors that limit airflow. Poorly ventilated bathrooms, kitchens, and laundry rooms are particularly vulnerable.
Solution: Install exhaust fans in bathrooms, kitchens, and laundry rooms to improve air circulation. Make it a habit to open windows and doors to let fresh air flow through your home, especially after activities that produce moisture, like showering or cooking.

3. Water Leaks from Pipes and Roofs

Hidden leaks inside walls, ceilings, or under floors provide the moisture mould needs to thrive. Even small leaks can lead to serious mould problems over time, often remaining undetected until the damage is extensive. A persistent musty smell or unexplained water stains can indicate hidden leaks.
Solution: Regularly check for leaks and repair them immediately to prevent moisture buildup. Schedule routine plumbing and roof inspections to catch leaks early before they lead to larger problems.

4. Condensation from Air Conditioning and Heating Systems

Air conditioning units and heaters can create condensation, leading to damp walls and ceilings, which can quickly develop mould. This is especially common when the temperature indoors is significantly different from the temperature outside, causing water droplets to form on windows and walls.
Solution: Ensure your HVAC system is regularly serviced and keep ducts clean. Using double-glazed windows and insulating walls can also help reduce condensation.

5. Flooding and Water Damage

Homes in flood-prone areas of Sydney face a high risk of mould growth due to water damage that isn’t dried properly. Carpets, wooden floors, and drywall absorb water quickly, creating the perfect conditions for mould growth if not dried within 24 to 48 hours.
Solution: After any flooding, act quickly to dry carpets, walls, and furniture using industrial fans and dehumidifiers. Consider replacing carpets with tiles or moisture-resistant flooring in flood-prone areas.

6. Damp Basements and Crawl Spaces

Areas under houses and in basements are prone to moisture buildup due to poor drainage, making them a prime spot for black mould. Many Sydney homes, especially older ones, have crawl spaces that trap moisture from the ground.
Solution: Waterproof basements, seal foundation cracks, and improve drainage around the home. Installing a vapor barrier and using sump pumps can also help keep moisture levels under control.

7. Poor Bathroom and Kitchen Maintenance

Steam from showers and cooking leads to high moisture levels in bathrooms and kitchens, increasing the risk of mould. Mould often grows in grout lines, under sinks, and on ceilings if these areas are not properly maintained.
Solution: Wipe down wet surfaces, install ventilation fans, and keep tiles dry. Consider using mould-resistant grout and waterproof sealants in bathrooms and kitchens.

8. Rising Damp in Older Sydney Homes

Older homes, particularly heritage properties, often suffer from rising damp due to deteriorating waterproofing. This occurs when moisture from the ground travels up through walls, leading to discolored paint, crumbling plaster, and a musty smell.
Solution: Treat rising damp with professional waterproofing and chemical barriers. Installing proper drainage and using breathable paints can help manage moisture levels.

9. Leaking Appliances (Washing Machines, Dishwashers, etc.)

Slow leaks from washing machines, dishwashers, and fridges can create mould beneath and behind appliances. Over time, unnoticed leaks can cause extensive mould damage to flooring and cabinetry.
Solution: Regularly inspect hoses and seals on appliances for leaks. Place leak detection sensors near high-risk appliances to catch leaks early.

10. Mould Growth in Carpets and Upholstery

Damp carpets and upholstered furniture can retain moisture, allowing mould spores to settle and grow. This is especially common in homes with poor ventilation or after spills that are not dried properly.
Solution: Use mould-resistant sprays and regularly clean carpets with professional-grade equipment. If mould has already developed, replacing affected carpets and furniture may be necessary.

Signs Your Home Has a Mould Problem

  • Musty or damp odours
  • Black or green patches on walls and ceilings
  • Peeling wallpaper or bubbling paint
  • Increased allergy symptoms like sneezing, coughing, and eye irritation

How to Prevent & Remove Mould in Sydney Homes

  1. Control indoor humidity – Use dehumidifiers and improve airflow.
  2. Fix leaks immediately – Check pipes, roofs, and appliances.
  3. Use mould-resistant paints and treatments – Especially in high-risk areas.
  4. Regular cleaning with mould-killing solutions – Vinegar, hydrogen peroxide, and commercial mould removers.
  5. Seek professional help – Persistent mould issues require professional remediation.

Conclusion

Mould is a major concern for Sydney homeowners, but understanding its causes and taking preventive measures can significantly reduce the risk. If mould has already taken hold in your home, professional removal is the best solution.

Contact Candid Cleaners today for expert Mould Remediation Services in Sydney!

Imagine you’re stressed about all those Taco Bell waste bags lying on your kitchen island, mould creeping up your bathroom walls, the unmaintained backyard, and your rental property routine inspection date is near!
Sounds overwhelming?

Well, it doesn’t have to be anymore!

Whether you’re securing your bond at the end of a lease or maintaining a property in peak condition, preparation is essential. This blog explores a detailed rental inspection checklist, providing step-by-step guidance to help you ensure a clean and tidy rental property at minimum notice.

Why Rental Inspections Matter For Both Tenants And The Landlords?

Rental inspections hold strong importance for both the tenants and the landlords. Generally, landlords can conduct rental inspections for about 4 times per year with at least 7 days notice. Suppose you own a property with this economy in Sydney, it is obvious that you’ll be conscious about its maintenance and overall condition to ensure it remains in top shape. Annual rental inspections allow landlords to assess the property’s condition and ensure it’s in good working order.

For tenants, these rental inspections provide an opportunity to deal with minor wear and tear in the property before they escalate. Moreover, these rental inspections are legally required as well to address any concerns tenants might have with effective communication and deal with them accordingly.

Preparing For A Rental Inspection: A Step-By-Step Checklist

Whether you are a landlord or a tenant, preparation for the rental inspection is required for both parties. Your landlord journey begins the moment you hand over the keys to your tenant throughout the lease period. It means that you must be ready for routine inspections and quality check-ups of your property.

Requirements For A Landlord:

  • As a landlord, this is what you are required to do in order to prepare for a rental inspection:
  • Notify your tenant at least 24 hours before the inspection in case of emergency. If you violate this rule (except if your tenant seems suspicious), your tenant can claim a legal violation of the lease agreement.
  • You can conduct 4 inspections throughout the year.
  • Make sure you are aware of all the items in your rental inspection checklist according to the lease agreement to avoid conflicts.

Requirements For A Tenant:

As a tenant, it is your prime responsibility to keep the property in top condition. It not only promotes trustworthiness with your landlord, but it also helps you secure a 100% bond-back with your end-of-lease period. Follow these tips for an organized home and a smooth inspection:

  • Review the lease agreement:
    It is highly recommended to familiarize yourself with your obligations in the lease agreement. Some agreements include specific clauses about property upkeep, such as maintaining smoke alarms or ensuring light switches are operational.
    So it’s better to be aware of your responsibilities beforehand to avoid conflicts and penalties.
  • Start cleaning early:
    Don’t wait for the last-moment rescue. Start deep cleaning the property early to address potential issues (if any) and their solutions. Focus on areas that are mandatory for inspection such as kitchen, bathrooms, and hard-to-reach areas.
  • Inspect for repairs:
    It is important to check any items in the property that require to be repaired from sliding doors and windows to handles, and locks. You can report any damage to your property manager that falls under wear and tear.
  • Check appliances:
    While you are preparing for your rental inspection, make sure to check all the kitchen appliances are fully functional. It provides you the opportunity to repair if there’s any dysfunctionality in any home appliance.

Pro Tip: Collaborate with professional end-of-lease cleaning service providers for detailed cleaning assistance. Learn how we handle deep cleaning tasks for a stress-free experience with our detailed end-of-lease cleaning service here.

Key Cleaning Tasks To Pass Your Rental Inspection

The Real Estate Agency (REA) follows a strict cleaning checklist to ensure that the property is spotless and all the appliances are fully functional. They look for spots, stains on the wall, moulds, pest infestation, pet damage, an unmaintained yard, and many more on the list. Read further to get tips on passing your rental inspection in one go.

How to clean the kitchen and appliances for rental inspections?

Kitchens are always the most notable and highly targeted areas for detailed inspections. Grease, grime, and food residue on appliances are common issues that landlords report. Here are some tips for effective cleaning:

  • Clean the oven, stovetop, and range hood using degreasers.
  • Empty and sanitize the refrigerator.
  • Wipe down all countertops, cupboards, and backsplash tiles.

For those struggling with stubborn grease stains, our professional kitchen cleaning services will be a game-changer for you.

Effective bathroom cleaning tips:

Just like the kitchens, bathrooms require keen attentive cleaning so that there’s no mark of stain left on any mirror or wall. Mould in grout lines, soap scum on shower screens, and water stains on taps can hurt your inspection results. Follow these tips for effective cleaning:

  • Scrub grout with mold removal solutions.
  • Clean and polish all mirrors and glass surfaces.
  • Sanitize sinks, toilets, and tubs.

Need a spotless property before your final inspection? Our comprehensive end-of-lease cleaning services specialize in tackling these problematic areas with 100% bond-back guaranteed.

Carpet and upholstery cleaning: steam or shampoo?

You might not know but your carpet has been hiding a lot of dust and dirt underneath that requires careful attention. If you own carpets and upholstered furniture, you might be confused about whether to choose steam cleaning or shampoo cleaning.

  • Steam cleaning is ideal for deep cleaning and removing allergens. It is perfect for tenants with pets or cleaning after long-term use. So if you’ve such a requirement, choose steam cleaning.
  • Shampoo cleaning is highly effective and best for removing heavy stains and providing a fresh scent.

It is recommended to consider professional carpet and upholstery cleaning services for high-quality results.

Walls, windows, and floors _ Don’t miss out on these details!

Windows are often overlooked areas when it comes to rental inspection. These areas can significantly impact your inspection results. It’s like a make-or-break situation. So, follow these tips for effective cleaning of such areas:

  • Spot-clean scuff marks and fingerprints on walls.
  • Wash windows inside and out to let natural light in.
  • Mop and vacuum floors, paying special attention to corners.

Common Rental Inspection Mistakes To Avoid

There are a lot of common mistakes people make while preparing for the final rental inspection which potentially impacts the integrity of landlord insurance.

Here’s a list of 5 common mistakes to avoid while preparing for the rental inspection:

  • Neglecting smoke alarms and safety checks.
  • Skipping over hard-to-reach areas.
  • Overlooking walls, windows, and floors.
  • Leaving mould and grime in bathrooms.
  • Unmaintained outdoor spaces.

It is recommended to schedule a mock inspection with a cleaning professional checklist to catch overlooked tasks and give yourself time to correct them.

DIY Vs Professional End-Of-Lease Cleaning Service – What Works The Best?

Choosing between a DIY and a professional end-of-lease cleaning service depends on the availability of resources and time management. Imagine your final inspection day is approaching and you find yourself in search of the necessary cleaning supplies. It is when the professional services come to the rescue. Here’s a comprehensive overview of both DIY and Professional end-of-lease cleaning services.

Factor DIY Cleaning Professional end-of-lease cleaning
Expertise and experience May lack proper training and experience. Highly trained and experienced professionals.
Quality of cleaning Uses basic, over-the-counter cleaning products. Utilizes industrial-grade products and equipment for a deeper clean.
Time management Time-consuming and may take longer to complete. Quick and efficient, saving you time for other tasks.
Coverage Risk of missing hard-to-reach areas or spots. Follows a checklist to ensure every area is thoroughly cleaned.
Bond recovery No guarantee for bond recovery or satisfaction. Offers satisfaction guarantees, increasing the likelihood of full bond return.

Don’t risk losing your bond—our expert cleaners are here to help. Book our professional end-of-lease cleaning service today to enjoy a stress-free inspection tomorrow!

Final Checklist Before Your Property Inspection

Finally, make sure to double-check all the requirements based on your legal lease documents. Go through the checklist and see if anything has been missed.

  • Walk through each room with this checklist to ensure all tasks are completed.
  • Take photographs of the property for documentation.
  • Fix any last-minute issues, such as loose handles or sliding doors.

Tips to declutter and organize before an inspection

  • Start Small: Begin with one room at a time to avoid feeling overwhelmed.
  • Use Storage Solutions: Invest in baskets, bins, and shelving to keep items organized.
  • Dispose of Unnecessary Items: Donate, recycle, or discard items you no longer need.
  • Create a Cleaning Schedule: Allocate specific days for decluttering and cleaning tasks.

Need a spotless property before your final inspection? Book our professional end-of-lease cleaning services in Sydney today! Don’t risk losing your bond—our experts are here to help.

What does End of Lease Clean Mean in 2025?

What does End of Lease Clean…

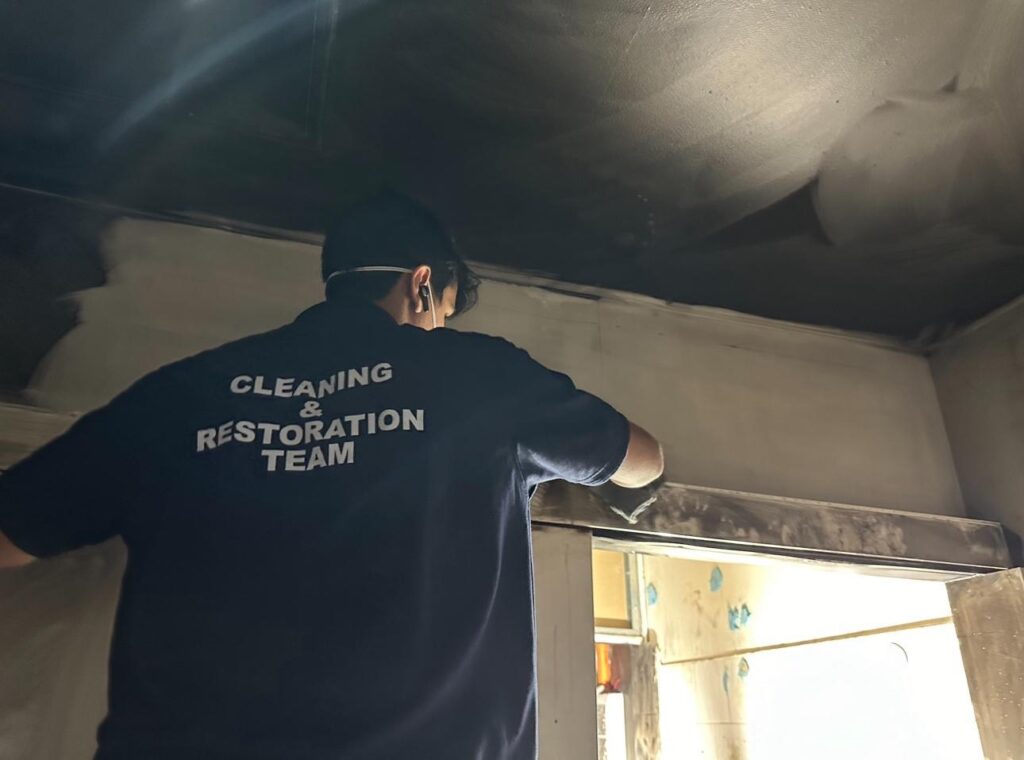
SummaryWhile not always a legal obligation, end of…

Causes of Mould Growth In Sydney Homes

Causes of Mould Growth In Sydney…

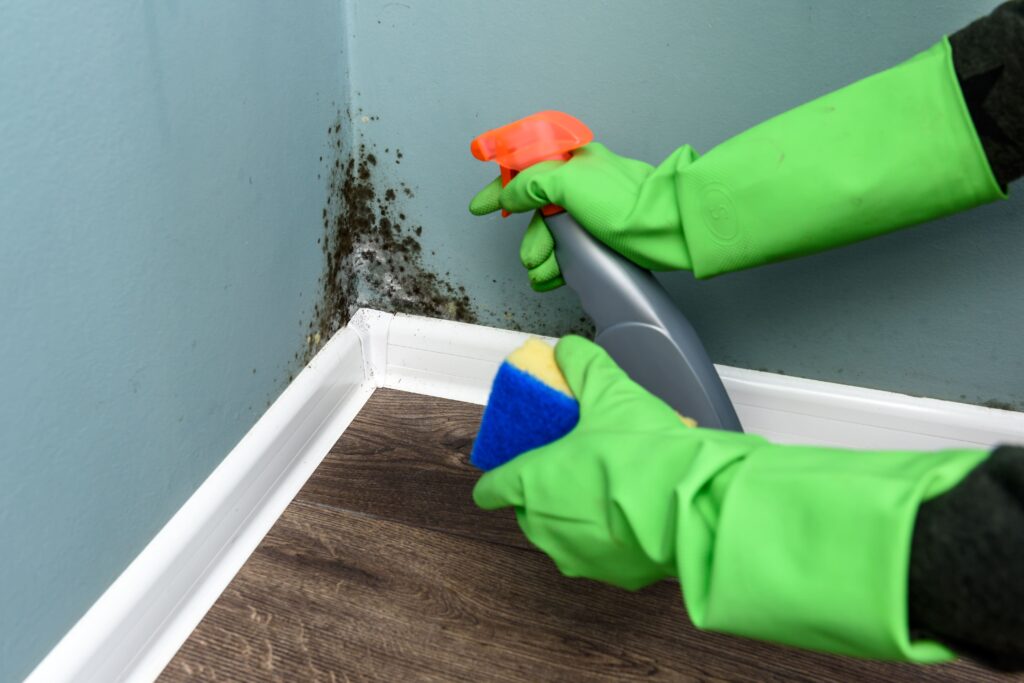
IntroductionMould is a common issue in Sydney homes…

Rental Inspection Checklist: Organizing Your Home For Success

Rental Inspection Checklist: Organizing Your Home…

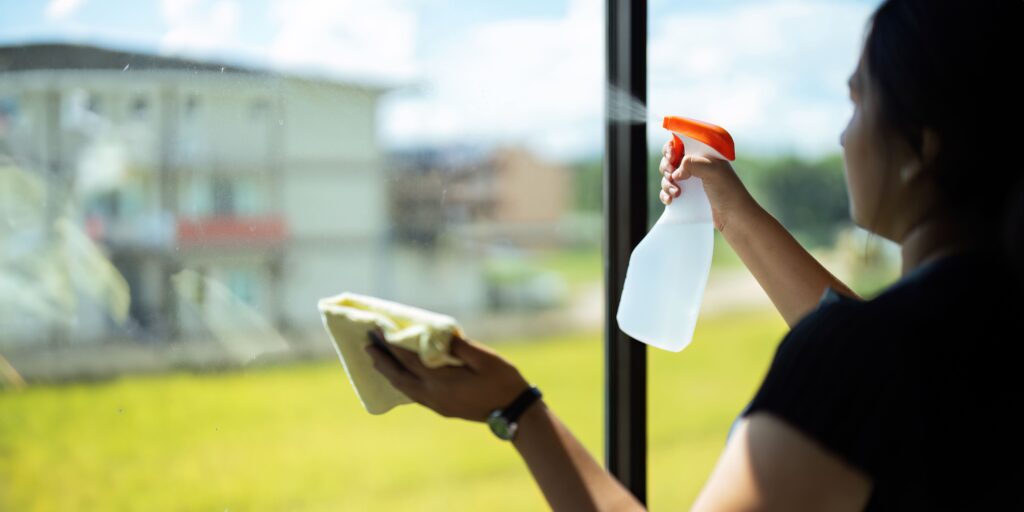
SummaryYour final rental inspection can become a smooth…